WordPress is the most popular content management system for launching websites of all kinds. However, it’s equally useful for web testing. Installing WordPress locally on your computer is an excellent way to test new features and learn about web development without the need for a live hosting plan.
In this article, we’ll walk you through the process of installing WordPress on your local machine using XAMPP in six simple steps.

Why Install WordPress on Localhost?
Setting up WordPress on localhost means your website will run in a local environment on your computer. This setup is ideal for:
- Web Developers and Designers: Test new themes, plugins, and updates before making them live.
- Beginners: Learn and experiment with WordPress without the need to purchase a domain or hosting.
- Site Owners: Create a safe environment to troubleshoot and fix bugs without affecting your live site.
How to Install WordPress on Localhost in 6 Steps
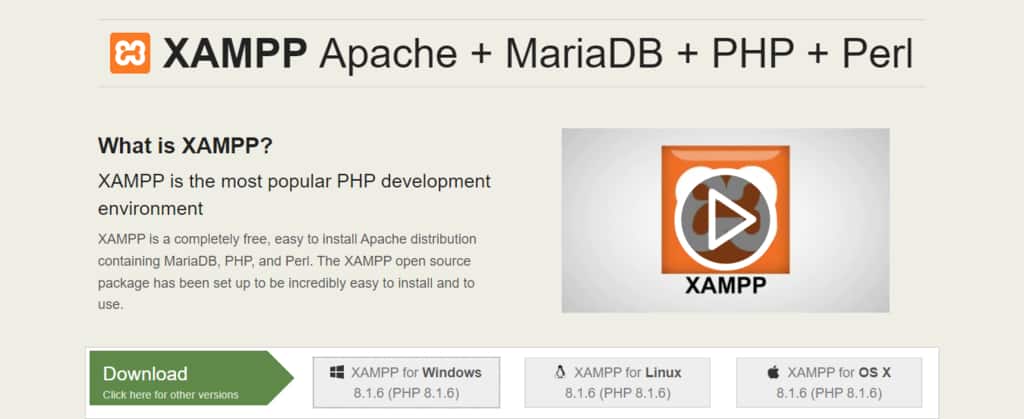
1. Download XAMPP
Visit the Apache Friends website and download the XAMPP version compatible with your operating system.
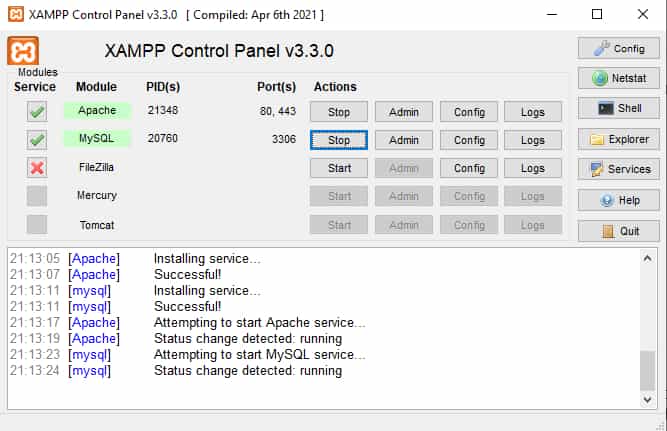
2. Install and Run XAMPP
Run the XAMPP installer and follow the setup instructions using the default settings. If prompted by your antivirus software, allow the installation to proceed. After installation, open the XAMPP control panel and start the Apache and MySQL modules.
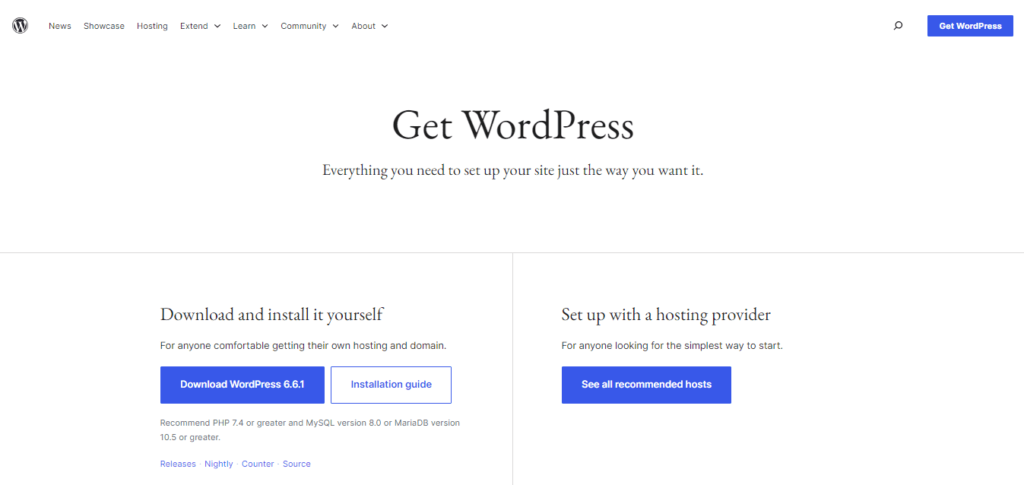
3. Download WordPress
Download the latest version of WordPress from the official WordPress website. Extract the ZIP file and copy the WordPress folder to the htdocs directory in your XAMPP installation folder (e.g., C:\xampp\htdocs\).
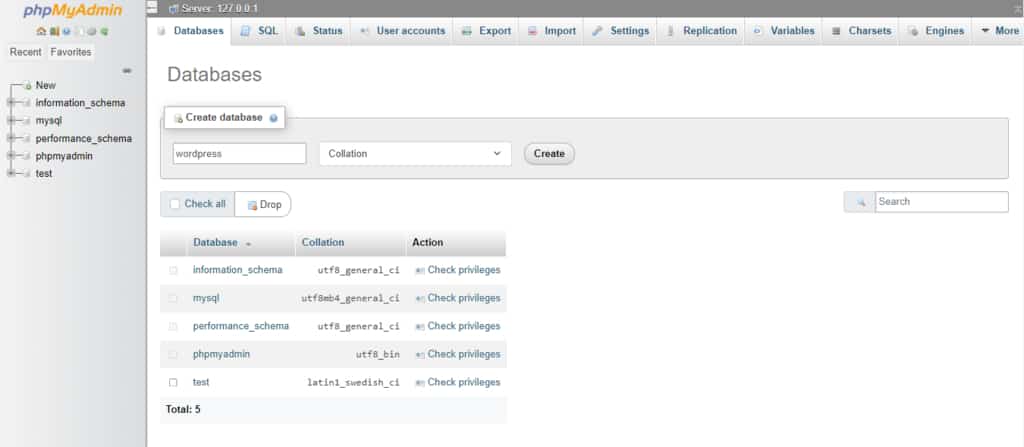
4. Create a Local Database
Open the XAMPP control panel and click the Admin button for MySQL to open phpMyAdmin. In phpMyAdmin, go to the Databases tab, enter a name for your database, and click Create.
5. Install WordPress
Finish installing WordPress locally by visiting http://localhost/foldername in your browser. Remember to replace “foldername” with the name of the folder you created in Step 3.
You’ll need to provide some information to set up your WordPress site. Fill in the database details as follows:
- Database name: Enter the name of the database you created in phpMyAdmin.
- Username: Use “root” as the default username.
- Password: Leave this field blank.
- Database host: Use “localhost”.
- Table prefix: Keep the default value “wp_”.
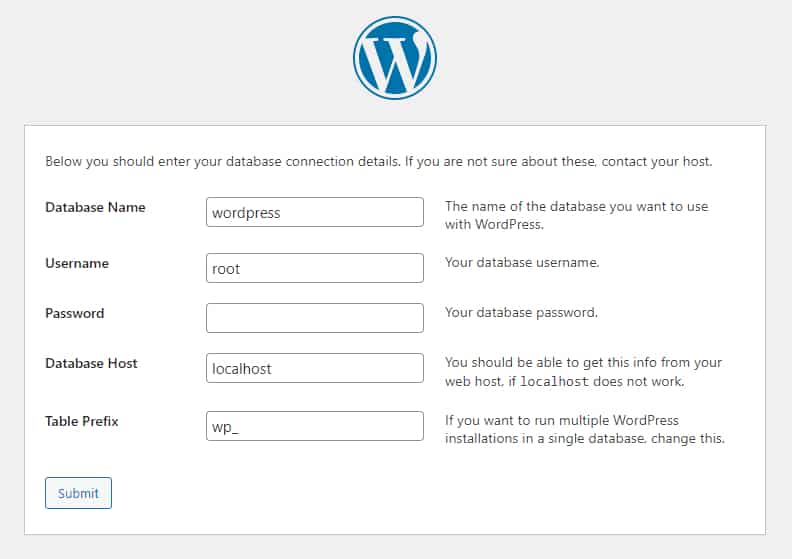
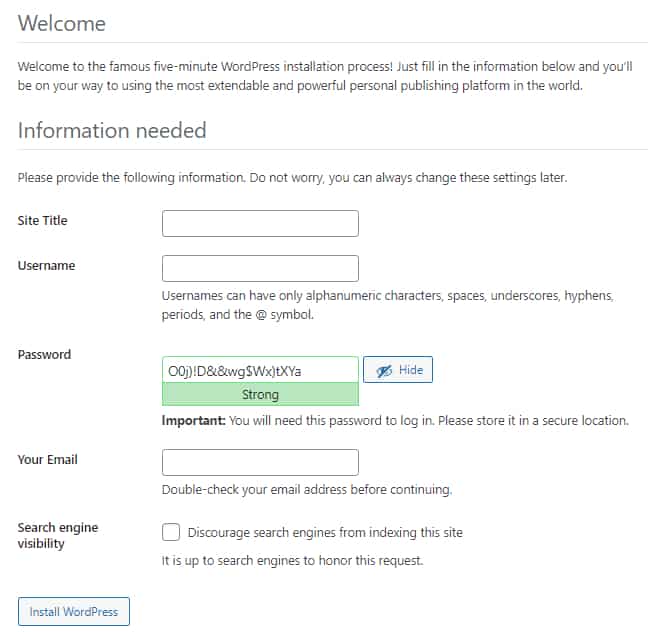
After filling in the details, click Submit and then Run the installation. Next, provide the required information like your site name and login credentials, and click on the Install WordPress button to complete the setup.
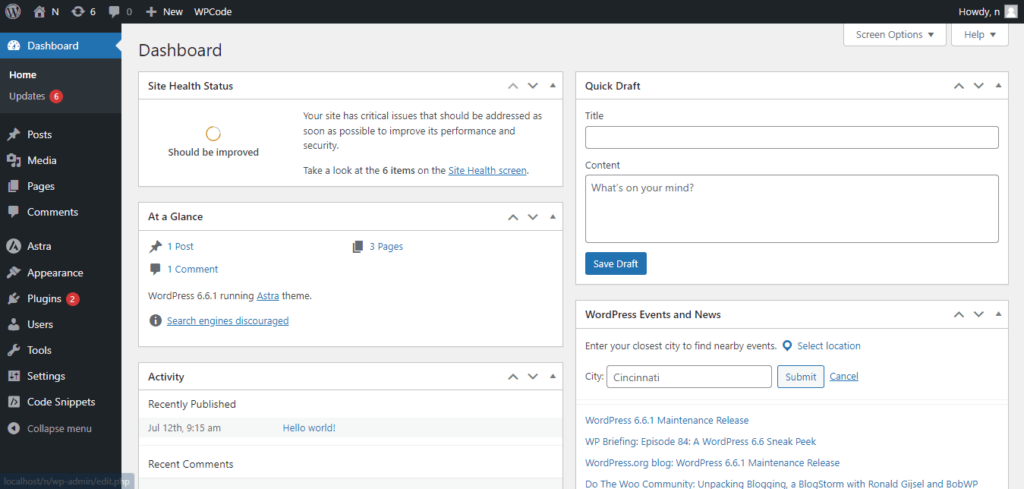
6. Check Your Local Site
Your local WordPress site is now ready. Access it by going to http://localhost/yourfoldername/wp-admin and log in with the credentials you set up during the installation.
Conclusion
Installing WordPress on localhost is a straightforward process that provides a safe environment for development and learning. Whether you’re a developer, designer, or a beginner, running WordPress locally can help you test new features and troubleshoot issues without affecting a live site.
FAQs – WordPress Localhost
Localhost refers to running a server on your local computer rather than on the internet. It allows you to develop and test websites offline.
No, once you have downloaded the necessary files (XAMPP and WordPress), you do not need an internet connection for the installation process.
Yes, there are other local server environments such as WAMP, MAMP, and Local by Flywheel that you can use to install WordPress locally.
You can use plugins like Duplicator to migrate your local site to a live server. Alternatively, you can manually export your database and files for the transfer. This approach provides flexibility and control over the migration process.
Disabling your firewall should be a temporary measure if necessary. Ensure to re-enable it after completing the installation to maintain your computer’s security.